How to Draw a Sloth Easy Step by Step
There's something admirable about how the humble sloth lives its life. These gentle tree-dwelling mammals are never in a hurry to get anywhere and they take life at their own pace.
They are so slow and lazy that their name is literally a definition for laziness!
Their unique appearance and reputation for laziness and slow movement have made them a popular animal in recent years.
That means that people have started to wonder how they can learn how to draw a sloth themselves.
This step-by-step guide on how to draw a sloth will answer the question of how you can learn to do it so that you can draw this lovably lazy creature!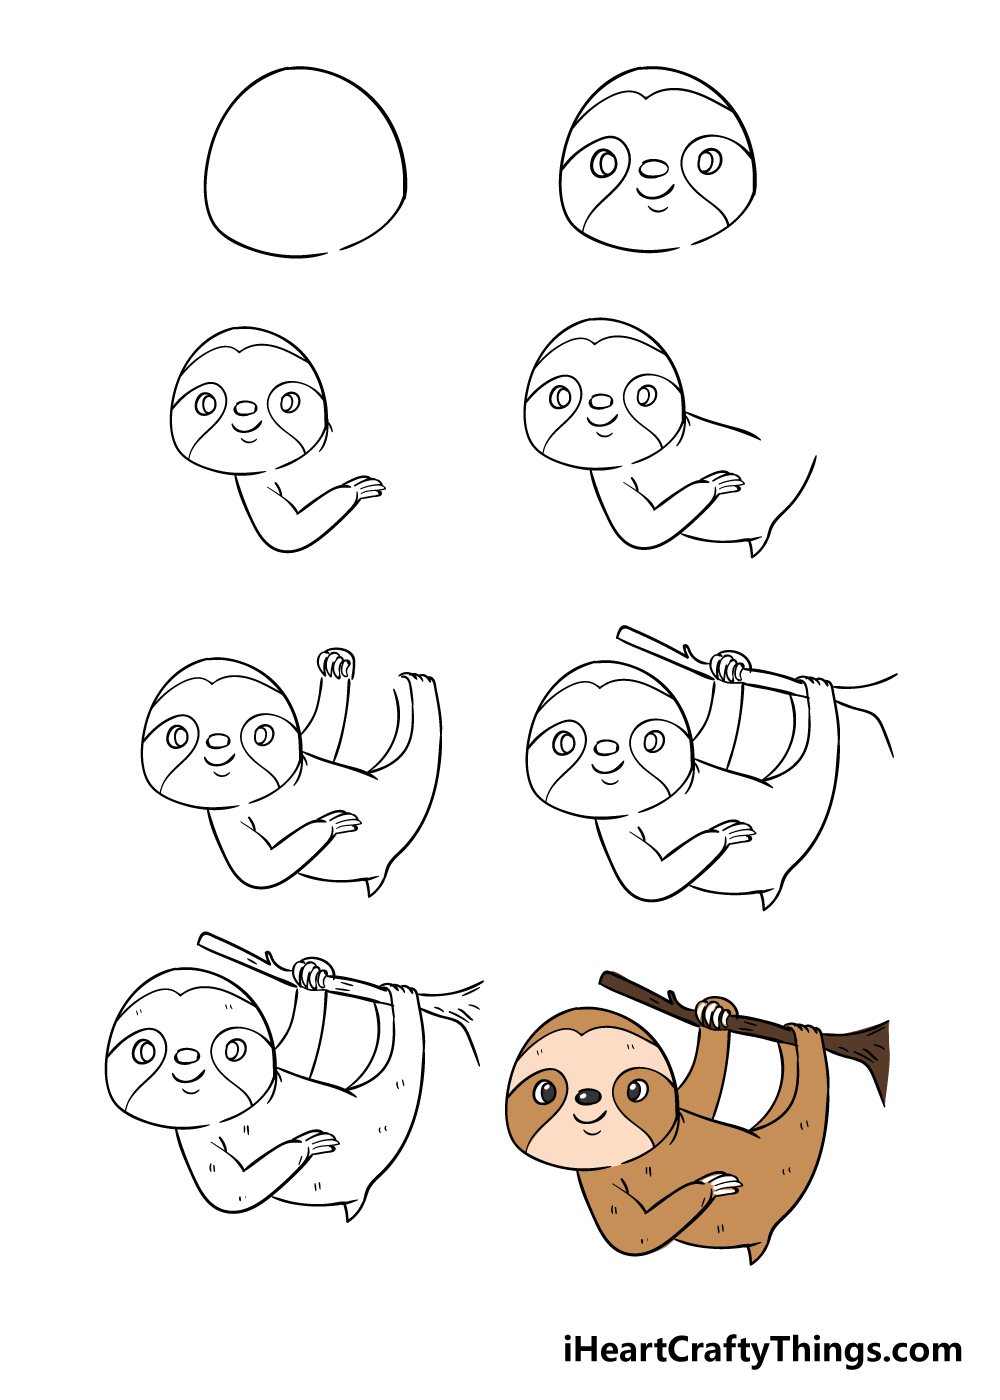
What's in this Blog Post
- How to Draw A Sloth – Let's Get Started!
- Step 1
- Step 2 – Next, draw a face for your sloth
- Step 3 – Now, draw an arm for your sloth
- Step 4 – Start drawing the body in this step
- Step 5 – Now, add the other arm and legs
- Step 6 – Next, draw the branch
- Step 7 – Draw some final details
- Step 8 – Now finish off your sloth drawing with some color
- Do this to take your sloth drawing to the next level
- Your Sloth Drawing is Complete
How to Draw A Sloth – Let's Get Started!
Step 1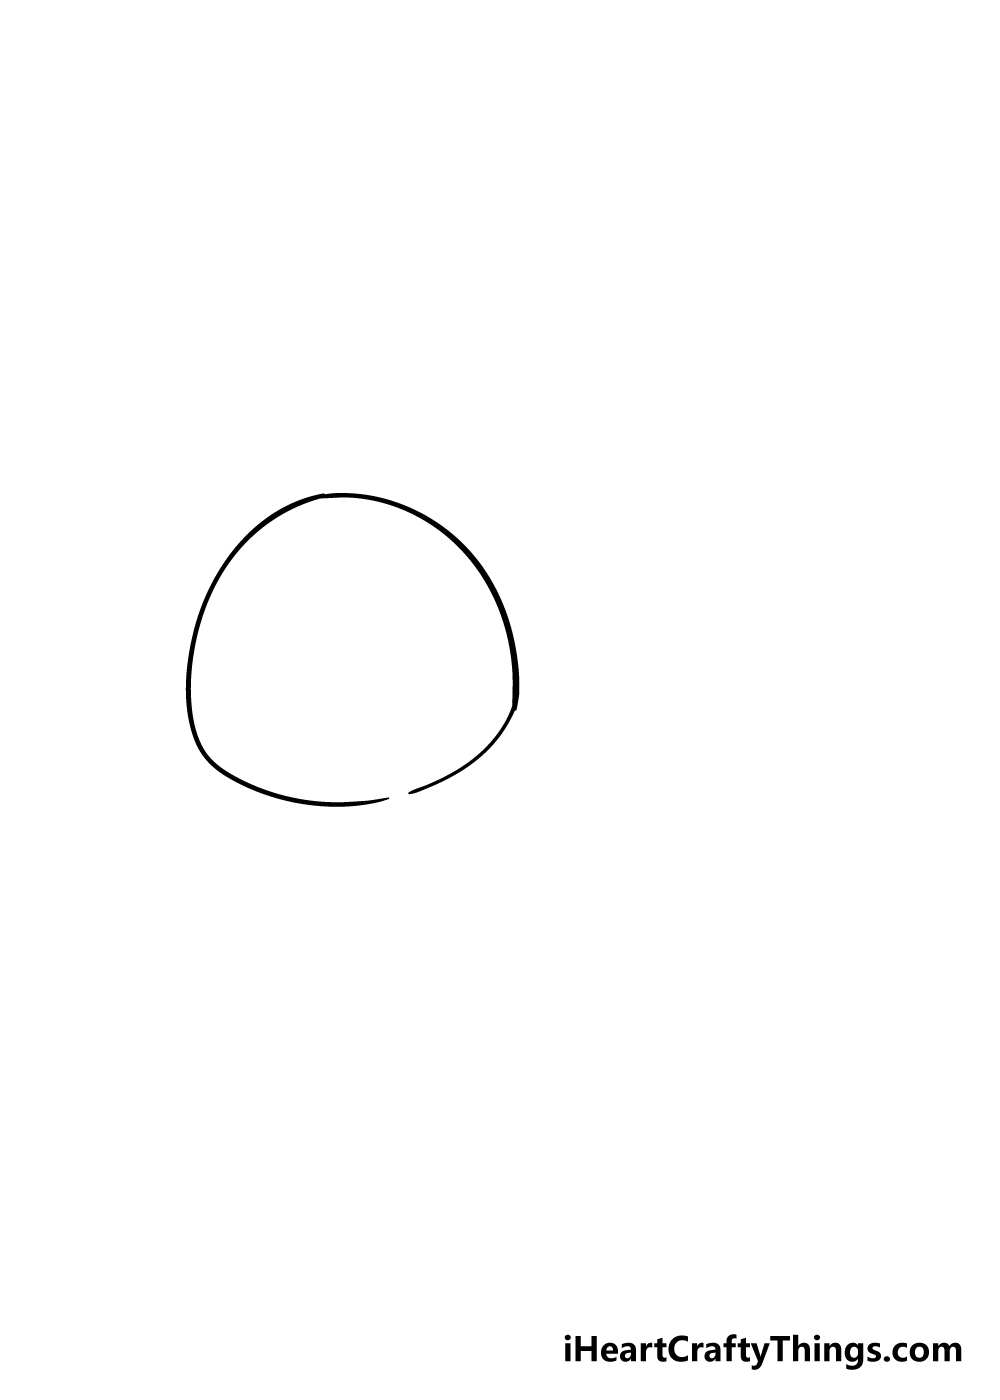
A sloth has a uniquely shaped head in addition to its rather unusual face design. We will be starting with the head outline in this first step of our guide on how to draw a sloth.
The reference image will show you how this should look. It is a rather rounded shape with an oval top and a slightly flatter bottom. Be sure to leave a tiny gap at the bottom as well!
Step 2 – Next, draw a face for your sloth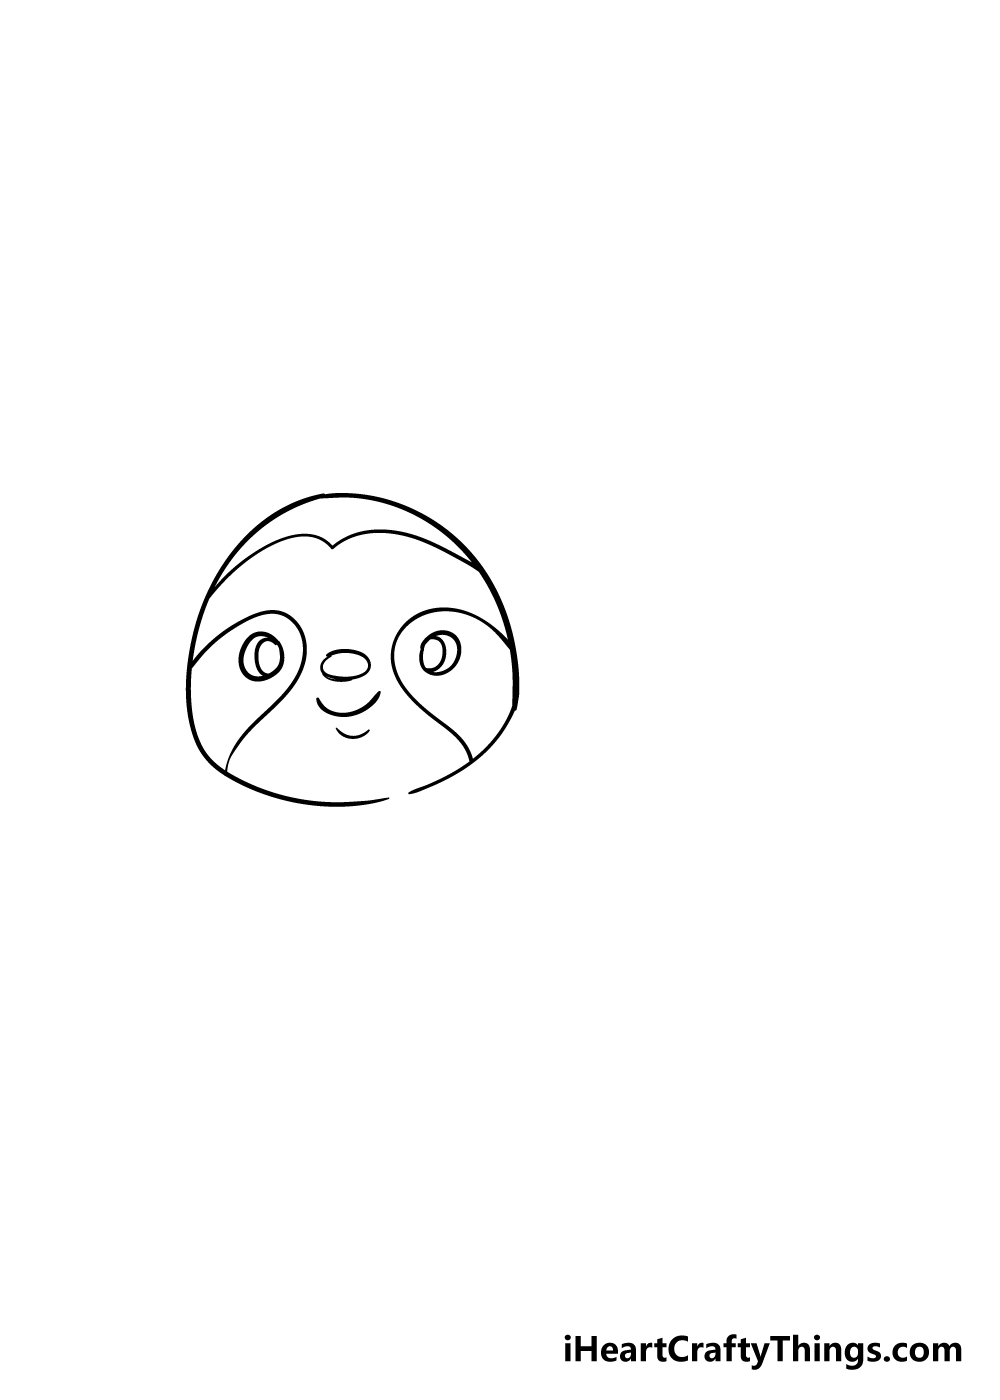
As we mentioned before, the sloth has a rather unique face design, and we shall be drawing that in for this part of your sloth drawing. You should start with the eyes, and to do this you should draw two circles.
Then you should draw two more circles inside of those ones, and have them both be on the inner edge of their respective eye.
There will then be a round nose and a simple curved mouth beneath those. You can then finish off this step with some rounded shapes around the eyes, and then draw a curved line near the upper section of the inner head outline.
Step 3 – Now, draw an arm for your sloth
While sloths won't be winning any races on land, they are certainly accomplished tree climbers thanks to their strong arms.
To draw one of these muscular arms, you can start a curved line coming out from directly below the head of the sloth. It will be thick and rounded, and don't forget to add some little claws at the end of the arm!
Step 4 – Start drawing the body in this step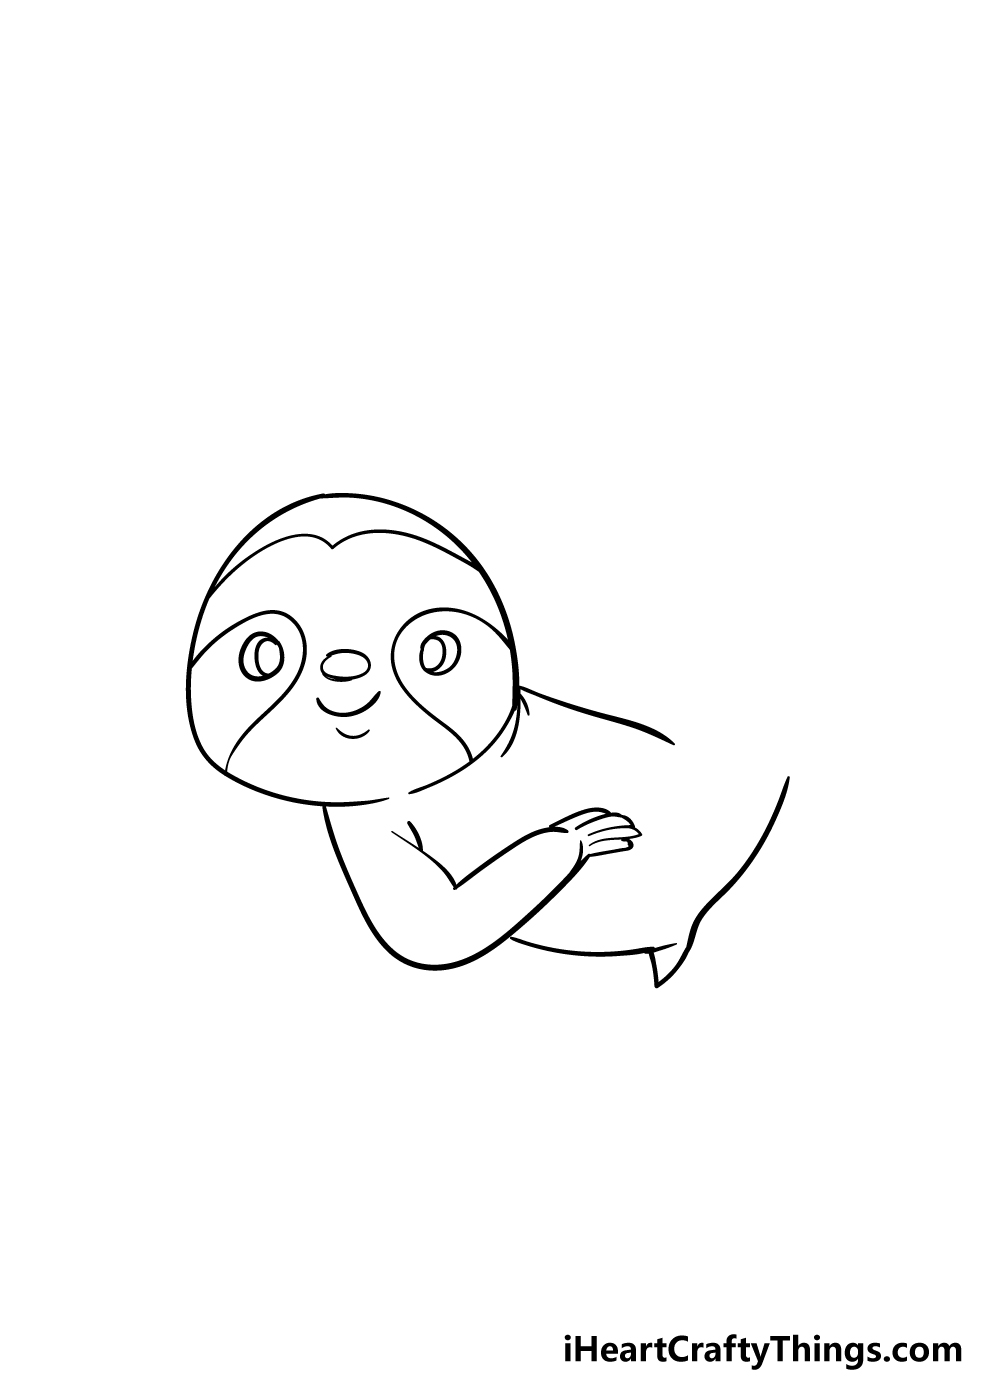
The head and arm that you have drawn will help you to position the body for this step of this guide on how to draw a sloth.
Once again, the top line of the body will come directly out from the head of the sloth. The bottom line will come out from the arm, and there will be a small, pointy tail drawn into this line as well.
Step 5 – Now, add the other arm and legs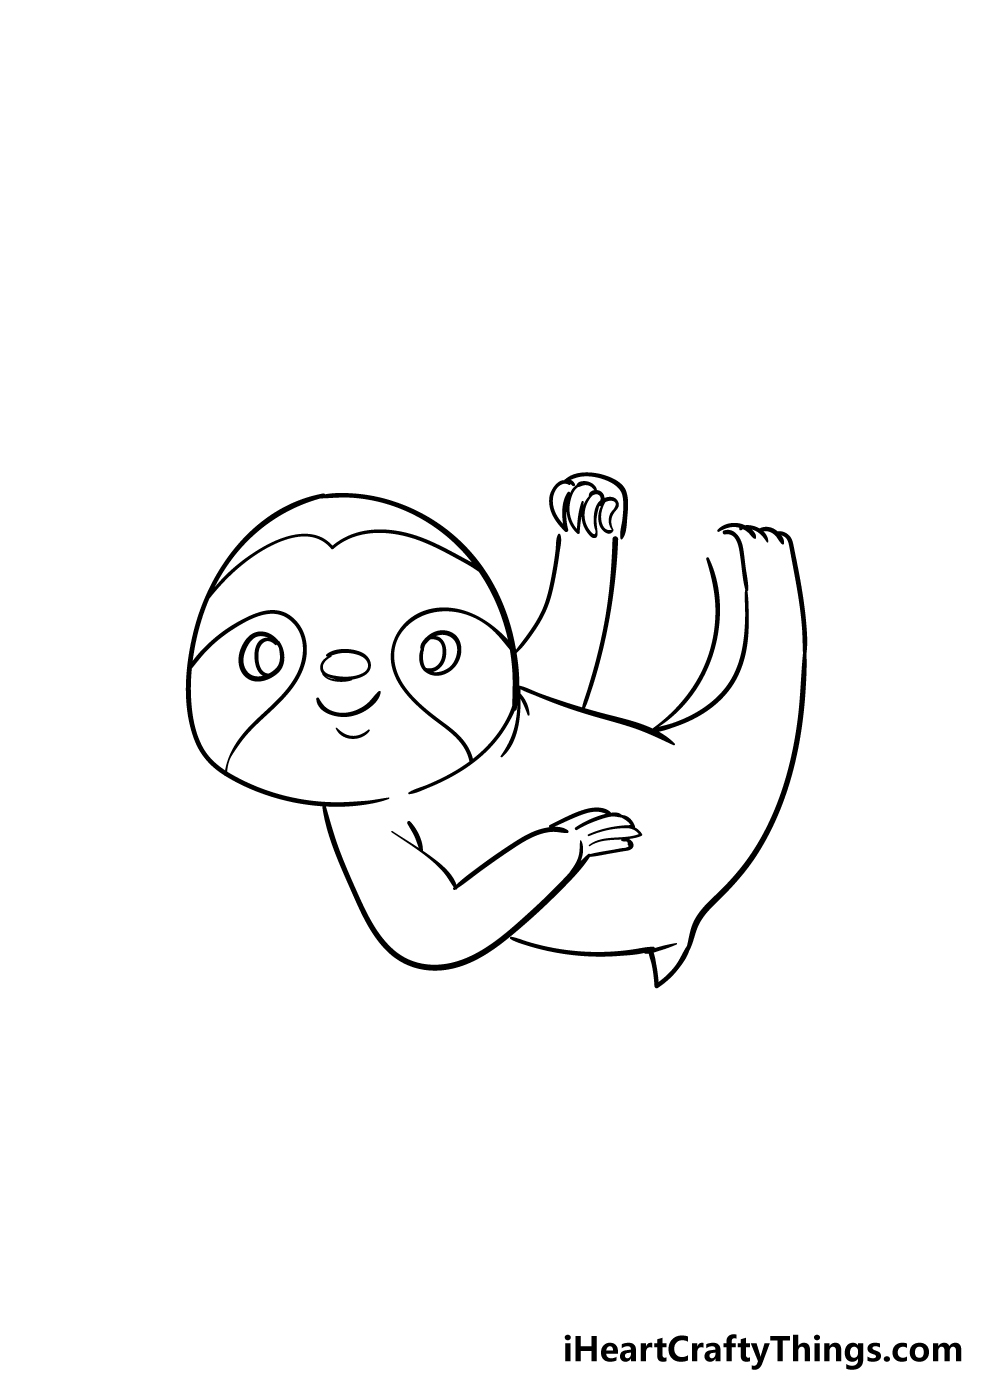
We will be finishing off the bulk of the body for your sloth drawing in this next step. Use some more curved lines to draw the legs out from the body, and then add the other arm with claws.
When drawing these limbs, be sure to leave the spaces in them that you can see in the reference image, as we will be drawing in the branch that he's hanging from into these spaces later.
Step 6 – Next, draw the branch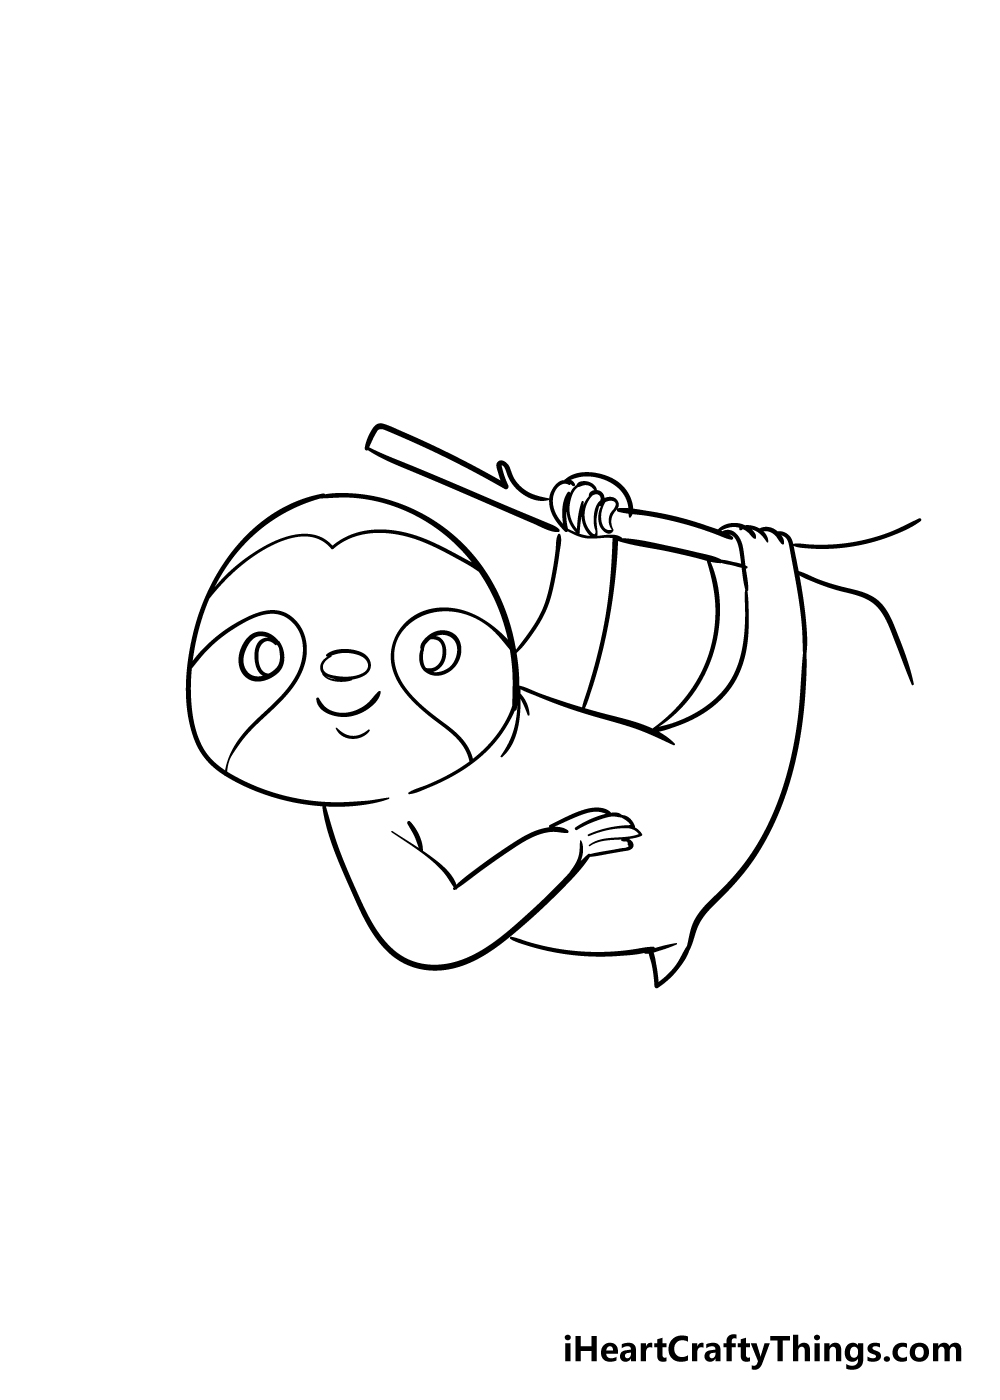
Speaking of branches, let's draw it in this step of this guide on how to draw a sloth!
The branch is thin and pretty straight, and it should slot nicely into and under the arms and legs from the previous step.
Step 7 – Draw some final details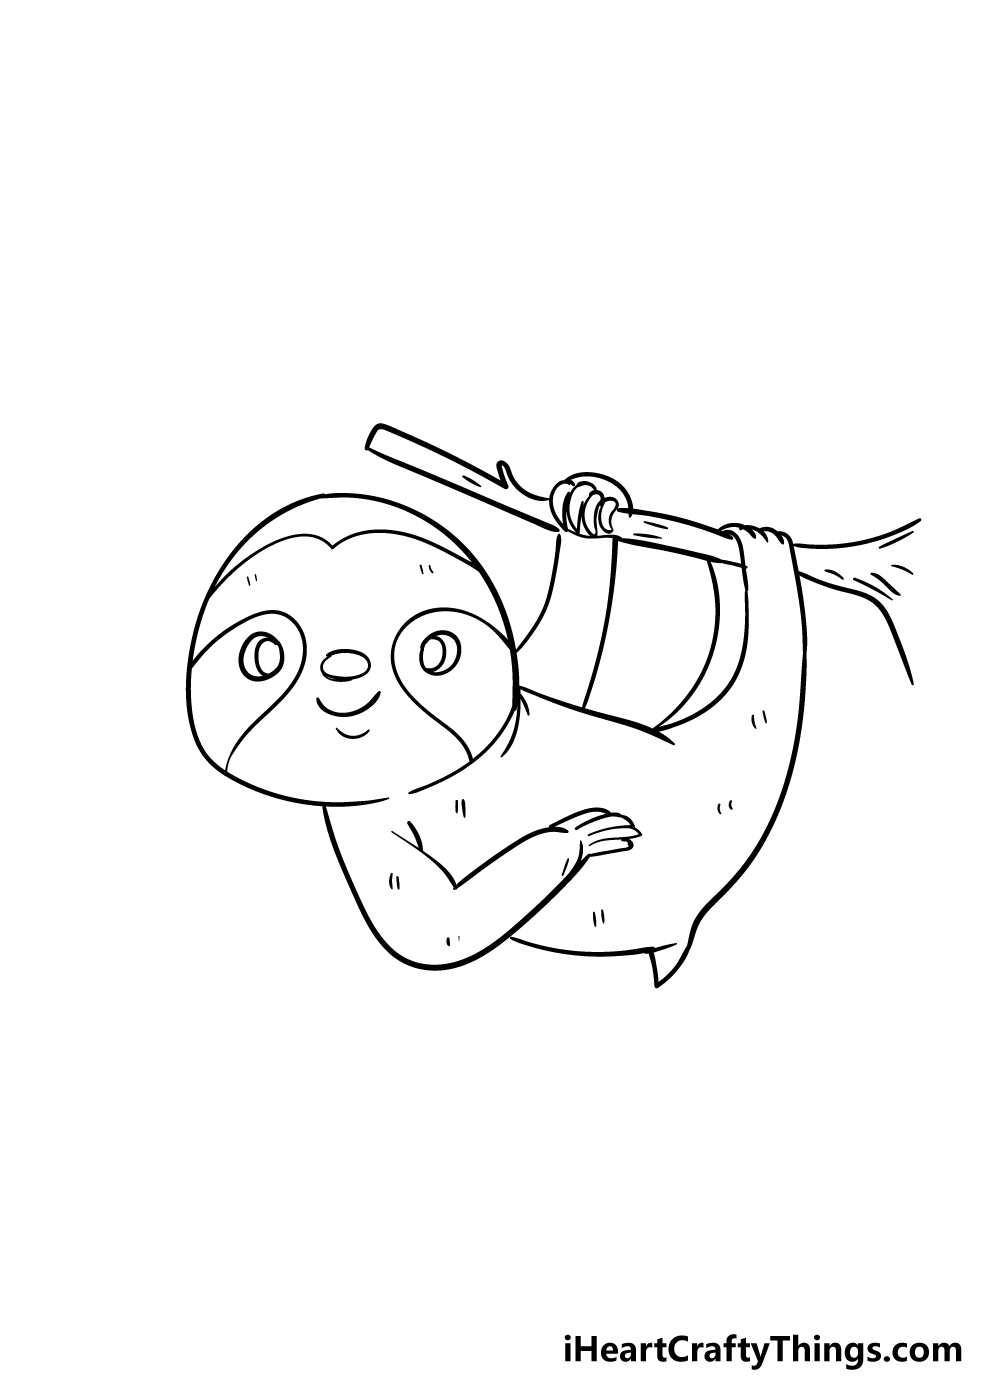
It's almost time to start coloring your sloth drawing, but we just have a few final details to add first.
These details that we included in our guide are simple yet effective. Simply draw some small lines onto your sloth for some fur detail, and then draw some more lines onto the branch for more wood texture.
Those are the details that we would add, but be sure to add any of your own that you would like for your picture! You could even add on to the background or draw some extra characters or elements.
Step 8 – Now finish off your sloth drawing with some color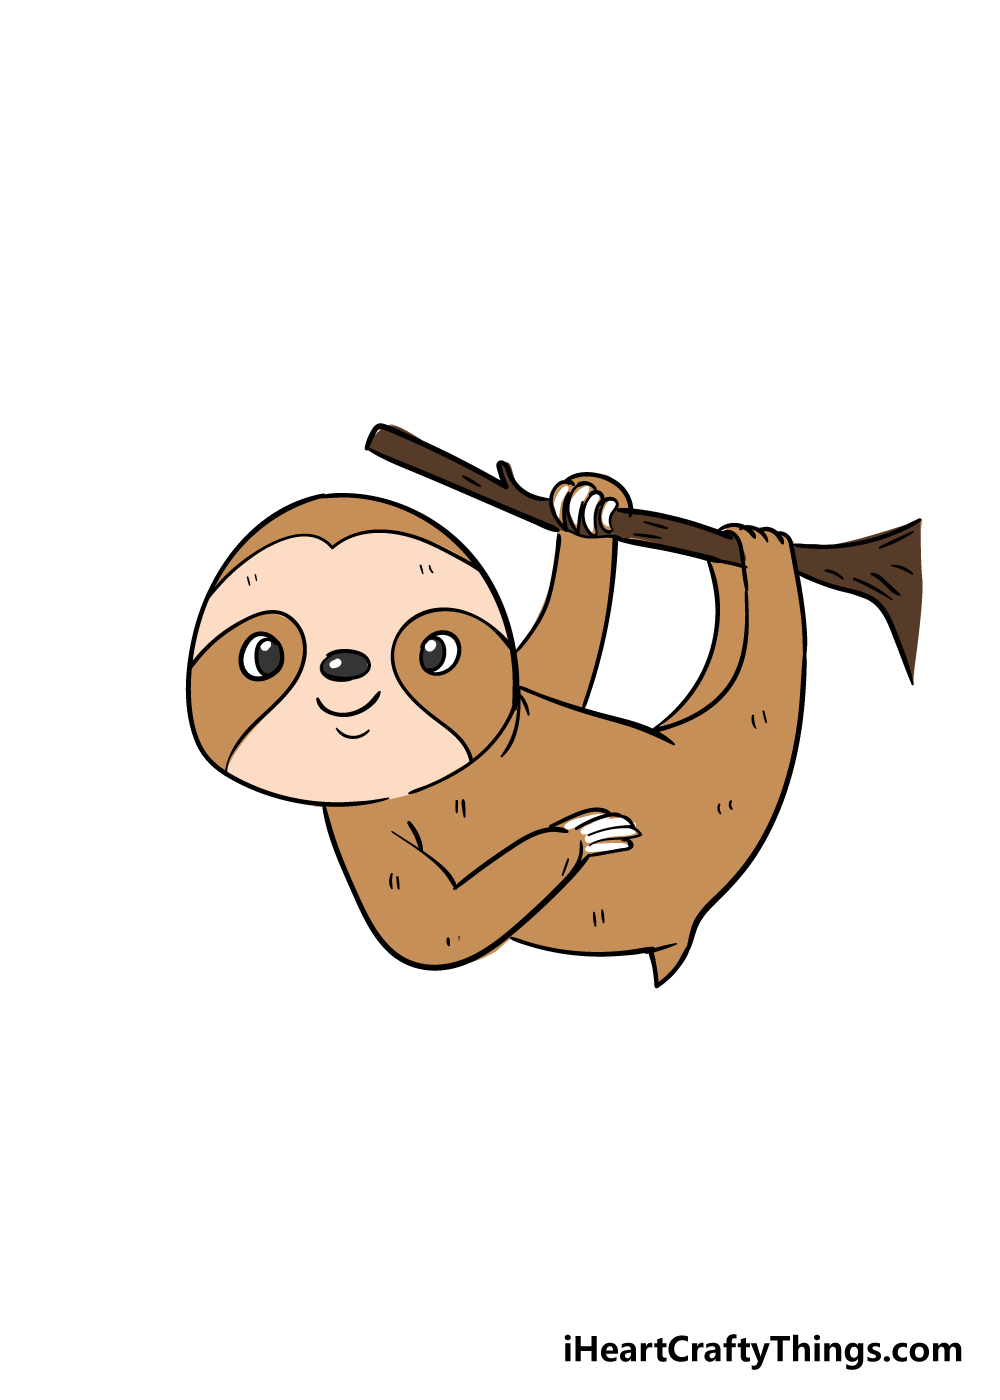
The eighth and final step of this guide on how to draw a sloth is all about getting creative and adding some beautiful colors to your drawing!
We used a simple, more realistic selection of browns for our example, but you should feel free to get creative with any colors you like.
This is your drawing so it's your rules! You could keep the colors more realistic or have a bright, technicolor sloth if you prefer.
When coloring in your sloth drawing, it might be fun to experiment with an art medium you're not as familiar with. You could try out some acrylic paints or maybe some watercolors depending on how you feel!
How will you bring this picture to life with color?
Do this to take your sloth drawing to the next level
Enjoy some lazy drawing fun as we show you some tips for improving your sloth sketch!
For this sloth drawing, we kept the focus on the animal itself. That means that we didn't add too much to the background, but you could do that now!
We added a branch that the sloth is hanging from, but you could add many more details to it as well.
By adding lots more branches and leaves to the background, you would make it look like this sloth is relaxing in the forest.
That's one idea, but can you think of some more unusual background settings?
Sloths aren't massively social creatures, but that doesn't mean you can't add a friend for this one! Now that you know how to draw one after finishing the guide, adding a second one should be easy.
If you will do this, simply follow the steps of the guide again and change some minor details as you go. How many sloths do you think you would like to add to this scene that you are creating here?
Another way to make your drawing of a sloth more unique would be by changing the style it is drawn in. We love the cute cartoon style of this sloth, but you could also make it look a bit more realistic.
If you wanted to do this, you could look up some photos of real sloths and use that to help you as you change certain details.
Or you could go in a totally different direction and make it even more cartoony and stylized!
Using your colors and art tools can be a great way to make this sloth sketch more unique as well. We showed you one way to color in this sloth in the guide, but this is where you can really let your creativity flow!
When choosing your art tools and mediums, remember that you don't have to stick to just one set of mediums. You can mix different art tools, techniques and colors to make the colors look amazing!
Your Sloth Drawing is Complete
This step-by-step guide on how to draw a sloth was designed to make drawing this lazy guy fun and easy for you to learn.
We hope that you had an amazing time taking it slow while learning to draw one of these amazing creatures!
Even though they have a distinctive look and design, our aim was to show you that drawing one can be easy if you take it slow and follow the steps.
Now you can bring this drawing to life in any way you please! You could do this by getting experimental and creative with colors, by drawing extra details or maybe by creating an awesome background.
The sky is the limit, and we will look forward to seeing all the interesting ways you will personalize your drawing!
Our website has many more incredible step-by-step drawing guides just like this one for you to enjoy, so be sure to visit us there!
You'll want to check in frequently, as we upload new guides all the time for you to download and enjoy.
Once you have finished drawing and coloring your sloth drawing, we would love it if you would share it on our Facebook and Pinterest pages.
We can't wait to kick back and relax with some wonderful and creative sloths!
Source: https://iheartcraftythings.com/sloth-drawing.html
0 Response to "How to Draw a Sloth Easy Step by Step"
Post a Comment